


LED display scan mode defines how many pixel rows light simultaneously — and it directly sets your display's brightness ceiling, refresh rate, and cost. Specifying the wrong scan mode cuts visible brightness by up to 75%, or adds 30–40% to your budget for performance your installation never needs. This guide decodes every scan mode from Static to 1/32, delivers a pixel-pitch-matched brightness table, and gives you a five-step framework to specify the right scan mode on your next purchase order.
Quick Answer — LED Display Scan Mode at a Glance
| Specification | Static | 1/4 Scan | 1/8 Scan | 1/16 Scan | 64 Scan |
|---|---|---|---|---|---|
| Duty Cycle | 100% | 25% | 12.5% | 6.25% | 1.56% |
| Brightness | ★★★★★ 8,000–12,000 nits | ★★★★☆ 4,000–5,500 nits | ★★★☆☆ 2,000–2,800 nits | ★★☆☆☆ 800–1,500 nits | ★★☆☆☆ 600–1,000 nits |
| Refresh Rate Cap | ≥4,800 Hz | ≥3,840 Hz | ≥1,920 Hz | ≥960 Hz | ≥3,840 Hz |
| Driver IC Cost | ★★★★★ Highest | ★★★★☆ +15–20% | ★★★☆☆ +8–12% | ★★☆☆☆ Baseline | ★★★☆☆ +5–10% |
| Power Consumption | Highest | High | Medium | Low | Lowest |
| Camera / Broadcast | ✅ Pro broadcast | ✅ Pro camera | ✅ DSLR | ⚠️ Smartphone only | ✅ High-speed cam |
| Best Use Case | Outdoor premium · Stadium | Outdoor direct sun · Billboard | Semi-outdoor · Covered | Indoor fixed · Office | Broadcast studio · Stage |
📌 Brightness values based on P4–P10 standard panels with quality driver ICs (MBI/ICN series). Actual nits vary by drive current calibration.
📌 64 scan achieves ≥3,840 Hz through more frequent row cycling — but at 1.56% duty cycle, brightness drops to 600–1,000 nits. Never specify 64 scan for outdoor environments.

What Is LED Display Scan Mode?

If your spec sheet shows "1/16 scan" and you are unsure what it means, you are not alone. "What is LED display scan mode" is among the most searched questions in LED display procurement. LED display scan mode describes how a display divides its pixel rows into timed groups. The fraction on your spec sheet — 1/4, 1/8, or 1/16 — tells you exactly how many pixel rows light up simultaneously.
The Physical Meaning of 1/N
Think of an LED display as a theater with 64 rows of stage lights. In 1/4 scan mode, 16 rows light up simultaneously, then the next 16, cycling so fast your eyes perceive a complete, uninterrupted image. This works because of human persistence of vision — the optical phenomenon where the brain retains an image for approximately 1/60th of a second after the light source switches off.
That persistence-of-vision threshold sits at approximately 60 Hz. Modern LED displays use time-division multiplexing to cycle pixel rows at 960–4,800 Hz — far above any visible flicker threshold.
The denominator N is the only number that matters at the spec stage:
1/4 scan: 1 pixel row lights per 4 rows → duty cycle 25% 1/8 scan: 1 pixel row lights per 8 rows → duty cycle 12.5% 1/16 scan: 1 pixel row lights per 16 rows → duty cycle 6.25% Static scan: every row lights independently → duty cycle 100%
Duty cycle is the master variable. It directly caps maximum brightness and sets the refresh rate ceiling — both covered in the next two sections.
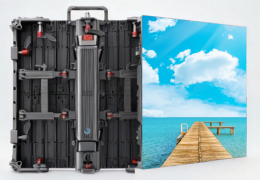
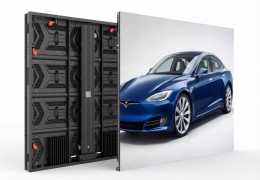
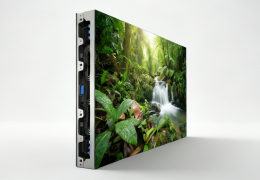
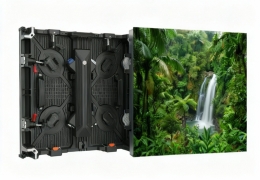
Static Scan vs Dynamic Scan — The Fundamental Split
All 1/N modes are dynamic scan: multiple LEDs share one driver IC via time-division multiplexing, taking turns. Static scan gives every LED its own dedicated IC channel — no time-sharing, no brightness compromise. That structural difference explains why static scan delivers 8,000–12,000 nits while 1/16 dynamic scan peaks at 800–1,500 nits at equivalent pixel pitch.
.jpg")
Remember this key point.:static scan is not universally superior. A static scan panel installed indoors wastes 30–40% of budget on brightness your environment cannot use. Matching scan type to installation context — not chasing the highest spec — is what delivers ROI.
How Scan Mode Controls Brightness
The practical difference between a 1/4 scan vs 1/8 scan LED panel comes down to one number: 5,000 nits. That is the outdoor sunlight visibility threshold — below it, your display disappears in daylight. Scan mode sets your brightness ceiling before the manufacturer touches a single calibration dial, and choosing one level down from what your environment requires costs you the display's visibility in direct sunlight.
Why Real Brightness Differs from Theory
Manufacturers compensate for lower duty cycles by increasing drive current — partially closing the theoretical gap, at a measurable cost:
| Compensation Method | Benefit | Hidden Cost |
|---|---|---|
| ↑ Drive current | Closes brightness gap vs higher scan mode | ↑ Junction temperature → 15–25% faster lumen depreciation over 5 years |
| ↑ PWM frequency | Higher refresh rate ceiling | Requires premium driver IC (MBI/ICN series) |
| Over-driving 1/16 scan | Reaches claimed outdoor nits figure | Accelerated LED aging — lifespan reduction begins within Year 2 |
A "budget-optimized" 1/16 scan panel claiming outdoor brightness has almost certainly been over-driven to hit its nits figure. The LED array pays for that claim in shortened operating life.
Pixel Pitch × Scan Mode = Actual Brightness (nits)
| Pixel Pitch | 1/16 Scan | 1/8 Scan | 1/4 Scan | Static |
|---|---|---|---|---|
| P2 indoor | 600–800 nits | 1,000–1,200 nits | N/A | N/A |
| P4 indoor | 800–1,200 nits | 1,500–2,000 nits | N/A | N/A |
| P6 semi-outdoor | 1,000–1,500 nits | 2,000–2,500 nits | 3,500–4,000 nits | N/A |
| P8 outdoor | N/A | 2,500–3,000 nits | 4,000–4,500 nits | 7,000–8,000 nits |
| P10 outdoor | N/A | N/A | 4,500–5,500 nits | 8,000–10,000 nits |
Sunlight Visibility Thresholds — Your Minimum Spec
Direct-sunlight visibility requires a minimum brightness level that your scan mode must support:
3,500 nits: readable in heavy shade or overcast outdoor conditions 5,000 nits: visible in direct afternoon sunlight — minimum for outdoor billboards 7,000+ nits: clear visibility at full midday sun — required for roadside and stadium screens
A P10 outdoor display at 1/8 scan peaks at approximately 3,000 nits — falling below the 5,000 nits threshold for direct-sunlight applications. The same cabinet at 1/4 scan delivers 4,500–5,500 nits, clearing the threshold. That single specification change costs approximately 15–20% more upfront and prevents a complete display replacement within 18 months of outdoor deployment.
Scan Mode and Refresh Rate — Camera Buyers Must Know
Scan mode and refresh rate are linked — but they are not the same specification. Confusing them leads to displays that look perfect to the naked eye but produce rolling black bars on every camera pointed at the screen.
How Scan Mode Influences Refresh Rate
Higher N scan modes cycle through more pixel row groups per second, generating a higher raw refresh rate potential. However, the actual refresh rate depends on two variables: the scan mode and the driver IC's PWM frequency. A quality 1/16 scan panel using MBI5153 ICs achieves ≥3,840 Hz — far above the 960 Hz theoretical minimum. A cheap 1/16 scan panel using counterfeit ICs may not clear 480 Hz, producing visible flicker even to the naked eye.
Camera Shutter Speed vs Minimum Refresh Rate
| Camera Setting | Minimum Refresh Rate | Recommended Scan Mode |
|---|---|---|
| Smartphone photo | ≥960 Hz | 1/16 scan |
| DSLR (1/250s shutter) | ≥1,920 Hz | 1/8 scan |
| Pro camera (1/500s) | ≥3,840 Hz | 1/4 scan or 64 scan |
| Broadcast (1/1000s) | ≥4,800 Hz | Static + PWM driver |
| High-speed (1/2000s) | ≥9,600 Hz | Static + specialized IC |
The Counter-Intuitive Truth About 64 Scan
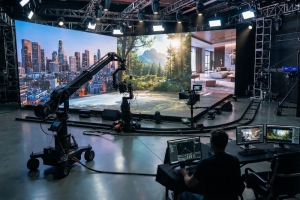
64 scan prioritizes refresh rate over brightness — each of its 64 pixel row groups lights for only 1/64 of the cycle, yielding a duty cycle of 1.56% and brightness of 600–1,000 nits. For broadcast studios and event stages where camera quality is the primary requirement and ambient light is fully controlled, 64 scan with a premium driver IC is the correct specification.
For any outdoor application, 64 scan produces a display that is invisible in natural light. Specifying 64 scan for an outdoor billboard is one of the most expensive single-specification errors in LED display procurement.
5 Steps to Select the Right Scan Mode
The most common LED display scan mode error is treating it as a single-axis decision — more is better, or cheaper is better. The correct framework evaluates five variables in sequence, each one narrowing the specification before moving to the next.
Step 1 — Establish your ambient brightness floor Will this display operate in direct sunlight at any point in its operating hours?
YES → 1/4 scan minimum. Static scan if budget permits. NO, semi-outdoor / covered → 1/8 scan sufficient. NO, fully indoor → 1/16 or 1/32 scan. Continue to Step 2.
This single gate eliminates 80% of scan mode specification errors made by buyers sourcing outdoor displays.
Step 2 — Confirm camera or broadcast requirements If any professional camera will film this display — at events, in a broadcast studio, or for social media content — specify minimum refresh rate first, then select the scan mode that achieves it with your chosen driver IC. A P4 indoor display for a broadcast studio needs 64 scan or Static, not 1/16 scan, regardless of cost.
Step 3 — Map pixel pitch to scan mode availability Not every scan mode is available at every pixel pitch. P2–P4 fine-pitch indoor panels are rarely produced in 1/4 scan; P10 outdoor panels are rarely produced in 1/32 scan. Cross-reference the brightness table in Section 2 to confirm your target pixel pitch and scan mode combination is manufacturable before issuing a purchase order.
Step 4 — Calculate the cost premium against your budget Use the Quick Answer table cost column. A 30–40% Static scan premium over 1/16 scan on a 100m² indoor installation adds significant upfront cost with zero indoor brightness benefit. Apply the premium only where the environment demands it.
Step 5 — Require IC brand and model on the specification sheet Scan mode without driver IC specification is an unverified claim. Require the IC brand and model number in writing before signing. Accepted premium IC families: MBI5153/5252, ICN2053, SUM2016. If a supplier cannot name the IC, treat the scan mode and refresh rate claims as unconfirmed.
Scan Mode Selection Matrix
| Environment | Recommended Scan | Min. Brightness | Refresh Rate Need | Cost vs Baseline |
|---|---|---|---|---|
| Outdoor — direct sun · billboard | 1/4 scan | 5,000 nits | ≥3,840 Hz | +15–20% |
| Outdoor — stadium · arena | Static | 8,000+ nits | ≥4,800 Hz | +30–40% |
| Semi-outdoor — covered canopy | 1/8 scan | 2,500 nits | ≥1,920 Hz | +8–12% |
| Indoor — office · boardroom | 1/16 scan | 800 nits | ≥960 Hz | Baseline |
| Indoor — retail · mall | 1/16 or 1/32 | 1,000 nits | ≥960 Hz | −5–0% |
| Broadcast studio · stage | 64 scan | 800 nits | ≥3,840 Hz | +5–10% |
| Rental · touring events | 1/8 scan | 2,000 nits | ≥1,920 Hz | +8–12% |
How to Verify Scan Mode and Avoid Supplier Fraud
Verifying scan mode before purchase requires no specialist equipment — just a specification sheet, physical access to the module, and a smartphone. Use all three methods in sequence, then cross-check against the three procurement traps below.
Method 1 — Specification Sheet Red Flag Screening (30 seconds)
A legitimate scan mode declaration uses precise notation. Evaluate any spec sheet against these criteria before proceeding:
✅ Acceptable: 1/8 scan dynamic drive · Static scan 1R1G1B · 1/16 scan 16-bit PWM 🚩 Red flag: High-speed scan — no denominator stated 🚩 Red flag: Enhanced refresh mode — unquantifiable marketing language 🚩 Red flag: Smart scan technology — no IEC or industry standard reference
Any specification sheet that avoids stating the scan fraction explicitly is concealing a lower-performing specification.
Method 2 — IC Count Formula Verification (5 minutes on-site)
Count the driver ICs on one LED module, then apply this formula:
Scan Denominator = Total LEDs on module ÷ Driver ICs ÷ 8
Example A: 512 LEDs, 8 driver ICs → 512 ÷ 8 ÷ 8 = 8 → 1/8 scan ✅ Example B: 1,024 LEDs, 8 driver ICs → 1,024 ÷ 8 ÷ 8 = 16 → 1/16 scan ✅ Result mismatches spec sheet → supplier misrepresentation 🚩
Method 3 — Smartphone Video Test (2 minutes)
Open your smartphone camera in video mode. Hold it 30–50 cm from a powered and actively displaying LED panel and observe the live recording:
No rolling bars, no flicker → refresh rate ≥960 Hz — specification credible ✅ Slow-rolling horizontal black bars → refresh rate below threshold — driver IC failure or scan mode misrepresentation 🚩 Fast flickering across full panel → PWM frequency critically low — reject panel 🚩
3 Procurement Traps This Method Combination Catches
Trap 1 — Specifying 64 scan for outdoor environments Outdoor buyers who follow "higher scan number = better quality" advice end up with displays delivering 600–1,000 nits in environments requiring 5,000 nits minimum. The display is commercially unusable in daylight. Correcting this error after installation typically costs $8,000–25,000 in panel replacement, depending on screen area.
Trap 2 — Accepting "high refresh" claims without Hz numbers Any supplier who describes refresh rate without citing a specific Hz figure cannot be held to a verifiable standard. Require a written specification stating the exact refresh rate (e.g., ≥3,840 Hz), the driver IC model, and a third-party test report — these three documents together constitute a verifiable refresh rate claim.
Trap 3 — Ignoring driver IC quality A 64-scan display built with counterfeit or subgrade driver ICs will perform worse in camera testing than a quality 1/16 scan panel. Scan mode sets the theoretical ceiling; driver IC quality determines whether the display reaches it. Always require IC brand and model on the purchase order — not as a courtesy item, but as a contractually binding specification.
Frequently Asked Questions
Q: What does 1/16 scan mean on an LED display? 1/16 scan means 1 out of every 16 pixel rows lights simultaneously, giving a duty cycle of 6.25%. The display cycles through all 16 groups at ≥960 Hz — fast enough for indoor fixed installations delivering 800–1,500 nits. It is the cost-optimal LED display scan mode for office, boardroom, and retail environments.
Q: Which scan mode is best for outdoor LED displays? 1/4 scan is the minimum for direct-sunlight outdoor installations, delivering 4,500–5,500 nits at P10 pixel pitch. Static scan is required for premium outdoor applications above 7,000 nits. Never specify 64 scan outdoors — its 600–1,000 nits output is invisible in daylight, regardless of how the spec sheet describes refresh rate performance.
Q: How do I verify LED display scan mode before buying? Use the IC count formula: divide total LEDs per module by driver IC count, then divide by 8. A module with 512 LEDs and 8 ICs = 1/8 scan. Cross-check against the spec sheet — any mismatch indicates misrepresentation. Confirm on-site with a smartphone video test: rolling bars mean the refresh rate claim is unmet.
Q: Why does scan mode affect camera recording quality? Scan mode determines refresh rate ceiling. Professional cameras at 1/500s shutter speed require ≥3,840 Hz — achievable with 1/4 scan or 64 scan using quality driver ICs. Displays below this threshold produce rolling black bars in video recordings regardless of how they appear to the naked eye.
Q: What is the difference between static and dynamic scan? Static scan gives every LED its own dedicated driver IC channel — no time-sharing — delivering up to 12,000 nits and 100% duty cycle. Dynamic scan (all 1/N modes) shares one IC across multiple LED pixel rows via time-division multiplexing, reducing cost by 30–40% but capping brightness proportionally. Static scan is not superior for indoor use — it costs more for brightness the environment cannot utilize.
Q: How much more does 1/4 scan cost compared to 1/16 scan? 1/4 scan carries a 15–20% cost premium over 1/16 scan at equivalent pixel pitch, driven by increased driver IC count per module. For outdoor installations where 1/4 scan prevents a display from being invisible in sunlight, this premium delivers direct ROI. For indoor applications, the same premium adds zero performance benefit — the five-step selection framework above covers every installation scenario from outdoor billboards to broadcast studios.