


Investing in an outdoor LED screen is a major decision that impacts your organization's visibility. Whether you're a church leader, school administrator, business owner, or part of an advertising agency, choosing the right outdoor LED screen means acquiring a powerful visual voice. This guide will help you navigate the process and avoid costly mistakes with outdoor LED displays.
However, the market is flooded with jargon: Pixel Pitch, Nits, IP65, Refresh Rate, SMD vs. DIP. What do they actually mean for your project?
Let's cut through the technical clutter. We'll guide you through 6 essential steps to make a smart purchase decision, ensuring your outdoor LED screen lasts for years—not just months.
Table of Contents
- Step 1: Defining the "Pixel Pitch" (Resolution)
- Step 2: Brightness & Visibility
- Step 3: Durability & Weatherproofing (IP Rating)
- Step 4: Installation & Maintenance Access
- Step 5: Visual Quality (Refresh Rate)
- Step 6: Total Cost of Ownership (Energy & Warranty)
- Summary Checklist for Buyers
- Final Thought
Step 1: Defining the "Pixel Pitch" (Resolution)
The User Question
"How clear does the screen need to be? Do I need 4K?"
Pixel Pitch (P) is the distance between LED clusters. It determines resolution and cost.
- P2.5 / P3: Very high resolution. Expensive.
- P5 / P6: Medium resolution. Standard industry workhorse.
- P8 / P10: Lower resolution. Budget-friendly.
The Buyer’s Formula
Don't overspend on high resolution if your audience is far away. Use the Optimal Viewing Distance Rule:
Pixel Pitch (mm) × 1 = Minimum Viewing Distance (meters)
Remember this key point: match the pixel pitch to your viewing distance to avoid wasting money.
Scenario A: Close Viewing
A digital sign for a school entrance where people walk by at 3-4 meters.
Choice: P3 or P4. Anything higher will look pixelated or grainy.
Scenario B: Medium Distance
A church sign or roadside billboard viewed from 6-10 meters.
Choice: P6 or P6.67. This is the industry "Gold Standard" for balance between cost and clarity.
Scenario C: Long Distance
A giant highway billboard viewed from 20+ meters.
Choice: P10 or P16. Spending money on P4 here is a waste; the human eye can't see the difference at that distance.
Step 2: Brightness & Visibility
Key Question: Visibility in Sunlight
"Will I be able to see it in direct sunlight?"
Indoor TV screens are usually 300-500 nits. Put that outside, and it looks black.
For outdoor screens, brightness is king—don't underestimate this!
The baseline: Outdoor screens must be at least 5,000 nits.
The safe zone: If your screen faces direct sunlight (especially South or West facing), aim for 6,000 - 7,500 nits.
Here's a smart feature to ask for: Ensure the screen has an Automatic Light Sensor. It dims the screen at night to avoid blinding drivers and save power, and pumps up brightness during the day.
Step 3: Durability & Weatherproofing (IP Rating)
User Concern: Weather Resistance
"Will it survive a storm, snow, or extreme heat?"
Outdoor screens fight a constant war against nature. You need to check the Ingress Protection (IP) Rating.
The standard: Look for IP65 Front / IP54 Rear.
Translation: The front is dust-tight and protected against water jets like rain.
The premium: Look for IP66 or fully sealed modules with aluminum kits.
Why? If you live in coastal areas with salt air or places with extreme humidity and heat like Florida or Texas, plastic modules can warp. Die-cast Aluminum cabinets disperse heat better and don't rust.
Watch out for this red flag! If a supplier offers a suspiciously cheap "outdoor" screen, it might be an indoor screen modified with glue. Do not buy this—it will fail within 6 months.
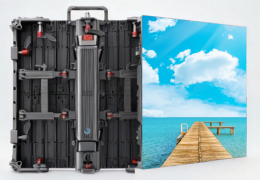
Step 4: Installation & Maintenance Access
Maintenance Access Question
"If it breaks, do I have to take the whole screen down?"
Screens require maintenance. Power supplies fail; cables get loose. How you fix it depends on how you install it.
Front Maintenance (Service from the front)
Best for: Wall-mounted screens or double-sided billboards.
How it works: You use a special tool to pop a module off from the front. No space needed behind the screen.
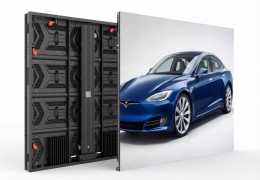
Rear Maintenance (Service from the back)
Best for: Pole-mounted billboards with a catwalk or platform.
How it works: Technicians open a door on the back of the cabinet. Usually cheaper to manufacture, but requires rear access space.
Here's a pro tip: If you are mounting flat against a building facade, Front Maintenance is mandatory.
Step 5: Visual Quality (Refresh Rate)
Flicker Issue on Camera
"Why do some screens look flickery on camera?"
Have you ever taken a video of a screen and seen rolling black lines? That's a low Refresh Rate.
Standard (1920Hz): Okay for basic text and logos.
High (3840Hz+): Highly recommended.
Why? If your screen will ever be photographed or videoed—like a church IMAG screen, sports scoreboard, or grand opening event—you need 3840Hz. It ensures the image is solid and flicker-free on social media and live streams.
Don't skip on this for future-proofing!
Step 6: Total Cost of Ownership (Energy & Warranty)
Real Cost After Purchase
"What is the real cost after I buy it?"
The sticker price is just the beginning. An inefficient screen is an electricity vampire.
Energy Efficiency: Ask about "Common Cathode" technology or energy-saving driver ICs. These can reduce power consumption by 30-40%, saving thousands of dollars in electricity over 5 years.
Warranty: A standard warranty is 2 years. A good supplier offers 3 to 5 years.
Spare Parts: Crucial. LEDs change color slightly between manufacturing batches. Ensure your supplier provides 3-5% spare modules from the same batch. If a module dies in 3 years, you cannot just buy a new one—it won't match the color. You must have spares on day one.
Remember: The initial cost is only part of the story; think long-term.
Summary Checklist for Buyers
Before you sign the contract, ask your supplier these 5 questions:
- "What is the exact pixel pitch and optimal viewing distance?" (Ensure it matches your site).
- "Is the brightness over 6000 nits, and does it auto-dim?" (Visibility + Energy saving).
- "Is the cabinet material Iron or Aluminum?" (Aluminum lasts longer outdoors).
- "Is the refresh rate 3840Hz?" (Future-proof for video and social media).
- "Does the quote include spare parts, receiving cards, and power supplies?" (Never buy without spares).
Final Thought
An outdoor LED screen is a 5-10 year asset. Don't just look for the lowest price per square meter. Look for the best build quality (Aluminum vs. Steel), safety features like UL/FCC compliance for US markets, and local supportability. The right screen will pay for itself in attention and impact; the wrong screen will be a very expensive black box.